
How to add Related Posts Widget to Blogger with Thumbnails
.

Related posts are a great way to attract your visitor to explore your site further more. It doesn’t matter how well you have designed your site to make it easy to navigate, but there are certain visitors who will spend only a few time on your site and then leave immediately. The best way to keep this visitors on track is to show them something they might feel interesting. Then what could be more accurate then showing them some of your similar articles. That’s why a related post option is so important.
All blogger widget providers are providing so many related post widgets. But no one provides a standard premium looking widget. And the thumbnail quality is important to attract people to spend more time in your website.
This is the way to do it. I am dividing the whole process in two terms - CSS Part and Java-Script - HTML Placement. So let me show you how to add this option to blogger.
First log in to your blogger account and then navigate to Template > Edit HTML.

Click anywhere inside the code and press the CTRL + F keys:
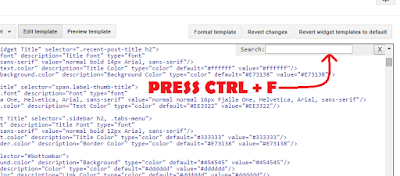
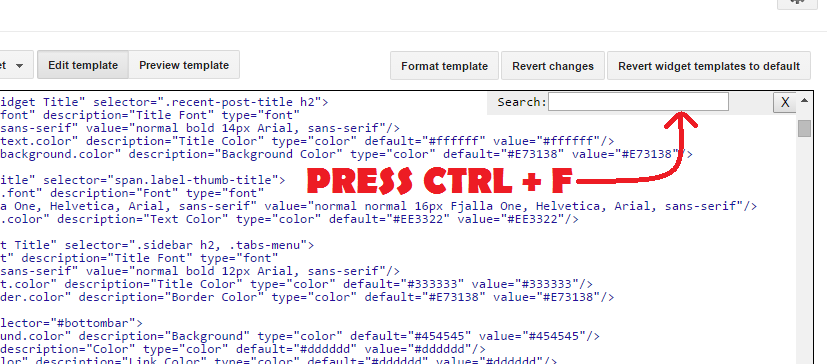
Search for this piece of code adding it inside the search box and hit enter to find it:
]]></b:skin>
Copy and Paste the below code just before the ]]></b:skin>tag:
/* Related Posts */
.related-post{margin:30px 0 0;position:relative;padding:0 0 10px}
.related-post h4 {color:#333;text-align:center;letter-spacing:1px;font-size:120%;font-weight:700;text-transform:uppercase;position:relative;padding:15px 20px;margin:0 0 20px}
.related-post h4:after {content:"";position:absolute;width:4px;height:4px;background:#E73037;border-radius:50%;bottom:0;left:46%;box-shadow:1em 0 0 0 #E73037,2em 0 0 0 #E73037}
.related-post ul{margin:0;padding:0}
.related-post-style-3,.related-post-style-3 li{margin:auto;text-align:left;padding:0;list-style:none;word-wrap:break-word}
.related-post-style-3 li a{color:#64707a;font-weight:700;font-size:13px;line-height:1.4em}
.related-post-style-3 li:hover a,.related-post-style-3 li a:hover{color:#E73037}
.related-post-style-3 .related-post-item{display:inline-block;float:left;width:29.2%;height:220px;padding:0;margin-left:3%;margin-bottom:15px;position:relative;overflow:hidden}
.related-post-style-3 .related-post-item:focus{outline:none;border:none}
.related-post-style-3 .related-post-item-thumbnail{display:block;margin:0 0 10px;width:100%;height:125px;}
/* CSS Item Responsive */
@media only screen and (max-width:640px){.related-post-style-3 .related-post-item {width:45.4%;}}
@media screen and (max-width:414px){.related-post-style-3 .related-post-item {width:100%;margin:0;padding:10px;}}
Find the line below (You will find two times, but you need to stop at the second one):
<div class='post-footer'>
Just above <div class='post-footer'> paste this code:
<div class='related-post' id='related-post'>
<script type='text/javascript'>
var mql = window.matchMedia('screen and (min-width: 992px)');if (mql.matches){
var labelArray = [<b:if cond='data:post.labels'><b:loop values='data:post.labels' var='label'>
"<data:label.name/>"<b:if cond='data:label.isLast != "true"'>,</b:if>
</b:loop></b:if>];
var relatedPostConfig = {
homePage: "<data:blog.homepageUrl/>",
widgetTitle: "<h4>You Might Also Like</h4>",
numPosts:6,
summaryLength:0,
titleLength: "auto",
thumbnailSize: 200,
noImage: "http://2.bp.blogspot.com/-pcWHSqKq44g/U6ZtZ5js6SI/AAAAAAAADu0/iR9lOJhGLKE/s1600/no-image.png",
containerId: "related-post",
newTabLink: false,
moreText: "Read More",
widgetStyle: 3,
callBack: function() {}
};}
</script>
<script type='text/javascript'>
removeRelatedDuplicates();
printRelatedLabels();
</script><script type='text/javascript'>
//<![CDATA[
/*! Related Post Widget for Blogger */
var randomRelatedIndex,showRelatedPost;(function(n,m,k){var d={widgetTitle:"<h4>You Might Also Like</h4>",widgetStyle:1,homePage:"http://www.smartpik.in",numPosts:7,summaryLength:370,titleLength:"auto",thumbnailSize:72,noImage:"data:image/png;base64,iVBORw0KGgoAAAANSUhEUgAAAAEAAAABCAIAAACQd1PeAAAAA3NCSVQICAjb4U/gAAAADElEQVQImWOor68HAAL+AX7vOF2TAAAAAElFTkSuQmCC",containerId:"related-post",newTabLink:false,moreText:"Baca Selengkapnya",callBack:function(){}};for(var f in relatedPostConfig){d[f]=(relatedPostConfig[f]=="undefined")?d[f]:relatedPostConfig[f]}var j=function(a){var b=m.createElement("script");b.type="text/javascript";b.src=a;k.appendChild(b)},o=function(b,a){return Math.floor(Math.random()*(a-b+1))+b},l=function(a){var p=a.length,c,b;if(p===0){return false}while(--p){c=Math.floor(Math.random()*(p+1));b=a[p];a[p]=a[c];a[c]=b}return a},e=(typeof labelArray=="object"&&labelArray.length>0)?"/-/"+l(labelArray)[0]:"",h=function(b){var c=b.feed.openSearch$totalResults.$t-d.numPosts,a=o(1,(c>0?c:1));j(d.homePage.replace(/\/$/,"")+"/feeds/posts/summary"+e+"?alt=json-in-script&orderby=updated&start-index="+a+"&max-results="+d.numPosts+"&callback=showRelatedPost")},g=function(z){var s=document.getElementById(d.containerId),x=l(z.feed.entry),A=d.widgetStyle,c=d.widgetTitle+'<ul class="related-post-style-'+A+'">',b=d.newTabLink?' target="_blank"':"",y='<span style="display:block;clear:both;"></span>',v,t,w,r,u;if(!s){return}for(var q=0;q<d.numPosts;q++){if(q==x.length){break}t=x[q].title.$t;w=(d.titleLength!=="auto"&&d.titleLength<t.length)?t.substring(0,d.titleLength)+"…":t;r=("media$thumbnail" in x[q]&&d.thumbnailSize!==false)?x[q].media$thumbnail.url.replace(/\/s[0-9]+(\-c)?/,"/s"+d.thumbnailSize+"-c"):d.noImage;u=("summary" in x[q]&&d.summaryLength>0)?x[q].summary.$t.replace(/<br ?\/?>/g," ").replace(/<.*?>/g,"").replace(/[<>]/g,"").substring(0,d.summaryLength)+"…":"";for(var p=0,a=x[q].link.length;p<a;p++){v=(x[q].link[p].rel=="alternate")?x[q].link[p].href:"#"}if(A==2){c+='<li><img alt="" class="related-post-item-thumbnail" src="'+r+'" width="'+d.thumbnailSize+'" height="'+d.thumbnailSize+'"><a class="related-post-item-title" title="'+t+'" href="'+v+'"'+b+">"+w+'</a><span class="related-post-item-summary"><span class="related-post-item-summary-text">'+u+'</span> <a href="'+v+'" class="related-post-item-more"'+b+">"+d.moreText+"</a></span>"+y+"</li>"}else{if(A==3||A==4){c+='<li class="related-post-item" tabindex="0"><a class="related-post-item-title" href="'+v+'"'+b+'><img alt="" class="related-post-item-thumbnail" src="'+r+'" width="'+d.thumbnailSize+'" height="'+d.thumbnailSize+'"></a><div class="related-post-item-tooltip"><a class="related-post-item-title" title="'+t+'" href="'+v+'"'+b+">"+w+"</a></div>"+y+"</li>"}else{if(A==5){c+='<li class="related-post-item" tabindex="0"><a class="related-post-item-wrapper" href="'+v+'" title="'+t+'"'+b+'><img alt="" class="related-post-item-thumbnail" src="'+r+'" width="'+d.thumbnailSize+'" height="'+d.thumbnailSize+'"><span class="related-post-item-tooltip">'+w+"</span></a>"+y+"</li>"}else{if(A==6){c+='<li><a class="related-post-item-title" title="'+t+'" href="'+v+'"'+b+">"+w+'</a><div class="related-post-item-tooltip"><img alt="" class="related-post-item-thumbnail" src="'+r+'" width="'+d.thumbnailSize+'" height="'+d.thumbnailSize+'"><span class="related-post-item-summary"><span class="related-post-item-summary-text">'+u+"</span></span>"+y+"</div></li>"}else{c+='<li><a title="'+t+'" href="'+v+'"'+b+">"+w+"</a></li>"}}}}}s.innerHTML=c+="</ul>"+y;d.callBack()};randomRelatedIndex=h;showRelatedPost=g;j(d.homePage.replace(/\/$/,"")+"/feeds/posts/summary"+e+"?alt=json-in-script&orderby=updated&max-results=0&callback=randomRelatedIndex")})(window,document,document.getElementsByTagName("head")[0]);
//]]>
</script>
</div>
Change the url in red color with your blog's url, Save the template and that’s it. Now the Related Posts widget should appear below each blog post. Thank You!
How to add Related Posts Widget to Blogger with Thumbnails
 Reviewed by Gokul
on
12/04/2015
Rating:
Reviewed by Gokul
on
12/04/2015
Rating:
Reviewed by Gokul
on
12/04/2015
Rating:
.
No comments: